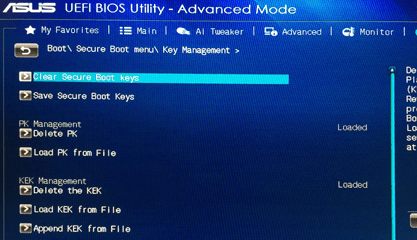
This article is a guide to “How to enable Secure Boot in the BIOS settings in Asus Laptops”
If we are trying to install Windows 11 or run Microsoft PC Health Check to see if our existing computer is able to run Windows 11, we may get an error message like the following: “I can’t get this pc to run Windows 11. If the PC does not support Secure Boot, it cannot be used.” In what way does Secure Boot work?
When the warning “The PC must support Secure Boot” occurs, what should you do?
What is Secure Boot all about?
A part of your PC’s UEFI, Secure Boot, ensures that only approved operating systems are able to start up. Malware can’t take over at boot time if you have this tool installed. To put it another way, it is necessary to first authenticate the hardware through the use of the onboard TPM chip before proceeding.
Is it better to have Secure Boot enabled or disabled?
Allowing Secure Boot on your computer will protect you from accidentally booting into a different operating system than the one you have installed on your hard drive e.g., from an unknown USB drive. You should disable the Safe Boot feature on your machine if it is running Windows 7.
How to enable Secure Boot in the BIOS settings in Asus Laptops?
When we go into the BIOS settings of the motherboard, we may enable the Secure Boot feature. The procedure for activating Secure Boot varies slightly depending on the manufacturer of the motherboard and PC in question. We will demonstrate how to enable Secure Boot on motherboards from MSI and ASUS, as well as notebooks from Lenovo, Dell, and HP. When using a motherboard or computer from a different manufacturer, please consult the motherboard manual, contact the motherboard manufacturer, or conduct a search on Google or Bing.
When using an MSI motherboard, how do you enable Secure Boot?
- Turn on the computer by pressing the power button, then immediately press the Delete key or F2 repeatedly until you reach the BIOS configuration screen.
- Select Security from the Settings drop-down menu.
- Set Secure Boot to Enabled from the Disabled position.
- Press the F10 key to save the changes, and then restart the computer to apply them.
Secure Boot will be located in a slightly different area from previous models.
When using an ASUS motherboard, how do you enable Secure Boot?
- Press and hold the F2 button for a few seconds before pressing the power button to turn on the computer.
- Enter the Advanced Mode by pressing the F7 key on your keyboard.
- Select Security, then Secure Boot from the drop-down menu.
- Select Enabled from the Secure Boot drop-down menu.
- Save and exit the configuration

